Graffiti Tutorial - How to Make Graffiti Art with Adobe Photoshop CS
Step 1.
The first is to do is prepare the ingredients to make a graffiti with digital techniques using Adobe's Photoshop CS. Where will the picture we will edit that into the work of graffiti art.

Step 2.
Put your logo or image you've prepared and then use the new layer. Logo or image that you prepare a pixel-based images (without the letters, lines and shapes) for the next step we will apply the "transfer perspective" that requires layers to be pixel-based.

Step 3.
Next step is Select "perspective transform" in the edit-menu en change the aspects of the logo that it fits the perspective of the wall. When you make a "perspective transform" the selection you're transforming gets a bounbing box. You can use the lines of this bounding box to align the logo with the wall.

Step 3.
If an image or logo is slightly wider than ... where you live should be set by pressing the button (CTRL + T) on your computer keyboard. If the logo or picture look less good, fit or you feel does not look realistic then you can change it by repeating the previous step.

Step 5 .
After this, put the blending mode of the logo layer to "overlay":
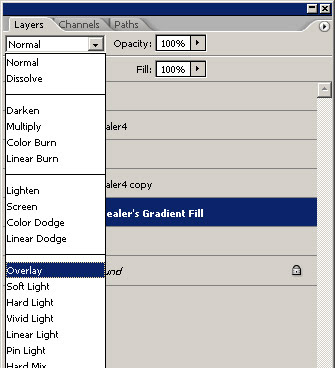
After you do what I tell the result would like this picture.

Step 6 .
The logo still has sharp edges and looks more like a sticker than a drawing graffiti. To make this a bit more realistic we are going to blur the edges a bit. To blur only the edges, but not the logo, you'll have to make a copy of the layer and place it under te original logo.
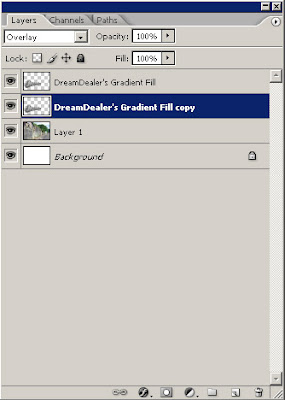
Step 7.
Blur the copied layer with a "Gaussian Blur" with a value of 5,0 pixels. Gaussian blur can be found in the filters menu.
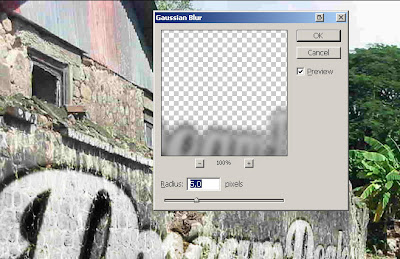
Step 8.
At last, to improve the realism, use the eraser tool to erase the logo where the wall is worn down.

This is the work of graffiti art created using digital computer techniques with adobe photoshop program. With Adobe Photoshop you can manipulate images more easily you can give even lighting effects and 3D effects on existing media.
No comments:
Post a Comment